
Tile floors sparkle. But grout? Not so much. Grout is a breeding ground. It stays damp and traps dirt. That makes it a safe space for microbes. Studies show bathroom grout often harbors just as many bacteria as shower floors, which can hold up to 60× more bacteria than the average toilet seat. No doubt, that’s a major reason you’re looking for how to clean grout between floor tiles.
The good news? You don’t need harsh chemicals or fancy tools to fix it. Just a few simple steps—and the right technique—will get your grout looking fresh again. Clean, quick, and without the stress.
Just so you know 🛍️—some links in this post are affiliate links. As an Amazon Associate, we may earn a small commission—at no extra cost to you! 💼🧹 It helps support the site and keeps the tips flowing! 💡
What You’ll Need Before You Start Cleaning Grout Between Floor Tiles
Want to clean grout between tiles without frustration? These tools make it easier and faster. No mess. And the best part? You probably have most of them already. Here’s what you need to set aside:
✅ Must-Have Tools:
✔Grout brush or old toothbrush – gentle but effective
✔Spray bottle – for applying your cleaner evenly
✔Microfiber cloths – for wiping and drying
✔Gloves – because grout gunk isn’t fun on skin
✔Bowl or bucket – for mixing your solution
🧪 Optional (But Super Handy):
✔Baking soda and vinegar – a favorite natural combo
✔Hydrogen peroxide – for deeper stains
✔Steam cleaner – great for larger tile areas
✔Grout pen – for touch-ups after cleaning
Quick heads-up: Skip anything harsh or bleach-based unless absolutely needed. It can wear down your grout over time. Need help choosing what works best? Stay tuned—we’ve got grout cleaning tips coming up that make this whole process even easier.
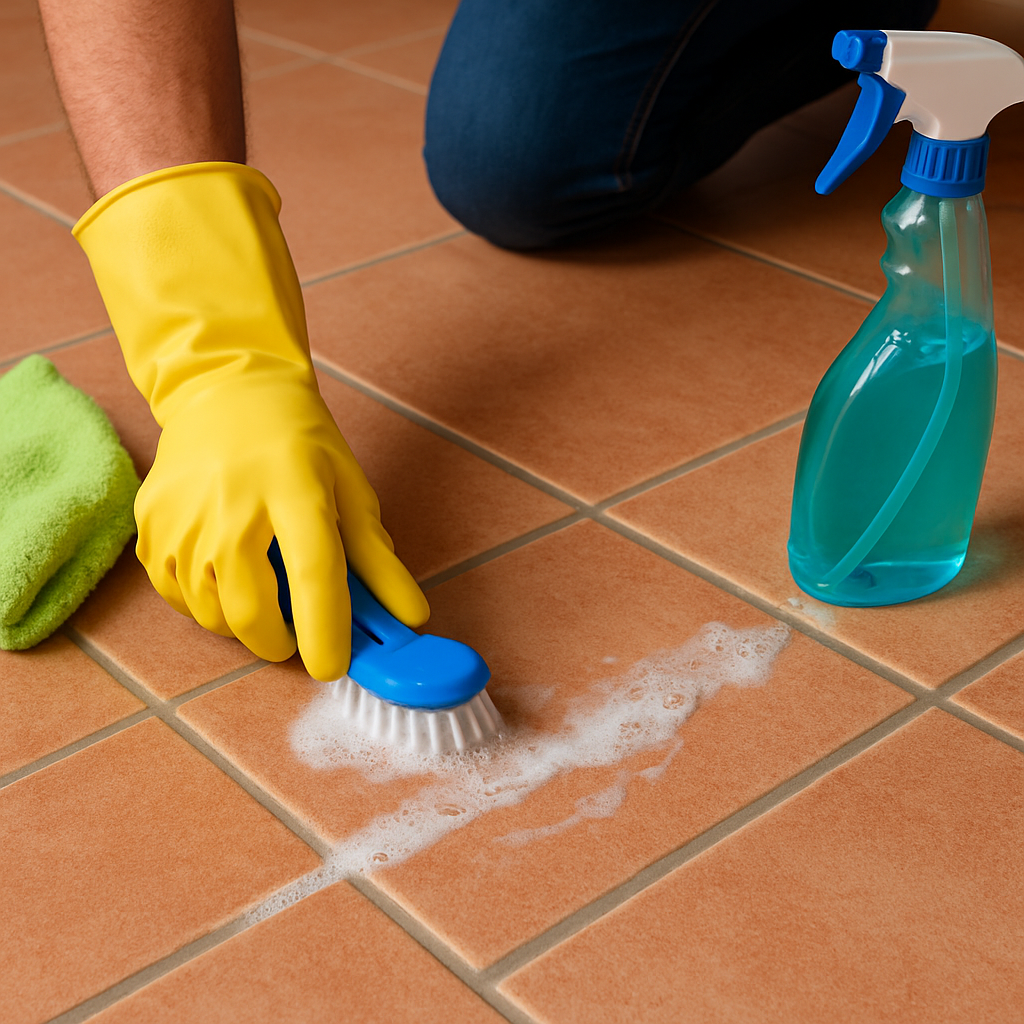
How to Clean Grout Between Floor Tiles—Step-by-Step

This is where the magic happens. Let’s break down exactly how to clean grout between floor tiles—no fancy tools, no guesswork. Just simple, solid steps that bring dirty grout back to life.
🔹 Step 1️⃣: Apply Your Cleaner
Start with your cleaner of choice. If you’re using a store-bought grout cleaner, follow the label. For a DIY mix, try baking soda and water for a paste, or equal parts vinegar and warm water for a spray.
Spray or spread it straight onto the grout lines. Get it into every groove. Don’t just splash and hope—it needs to cover well. Be generous but neat. And don’t forget the corners—they collect the most grime.
Let it sit for a minute while it starts to break down the dirt.
🔹 Step 2️⃣: Let It Sit (and Do Its Thing)
Now wait. Let the cleaner work for at least 5 to 10 minutes. That’s key. Rushing this step is where most people mess up. During this time, the solution loosens up deep-set dirt and any greasy stuff hiding in the pores. If you’re using a natural mix, this sit time matters even more—natural cleaners work slower but are just as effective when given time.
Need to hit a bigger area? Clean in sections so nothing dries out too soon.
🔹 Step 3️⃣: Scrub the Grout Lines
Now for the elbow grease. Grab your grout brush or old toothbrush and start scrubbing. Use small, circular motions and focus on one line at a time. Apply steady pressure—but not too much. Let the brush do the work. If your cleaner starts to dry, spritz again as you go. You’ll notice the dirt lifting as the grout lightens up.
Want a tip? Wipe as you go to keep dirt from resettling into cleaned areas.
🔹 Step 4️⃣: Wipe It All Clean
Once the scrubbing is done, it’s time to wipe everything down. Use a damp microfiber cloth to lift the grime and any leftover cleaner. Be thorough here. Any residue left behind can make grout look cloudy—even if it’s technically clean. If needed, go over the area twice. You can also mop with warm water for larger spaces; just don’t flood it.
If some spots still look stained, don’t stress—we’ll tackle that next.
🔹 Step 5️⃣: Dry It Out Completely
Last step, but don’t skip it! Use a clean, dry cloth to blot and dry the grout lines. Leaving moisture behind—even clean water—can pull new dirt in fast. Open windows or turn on a fan if you’re in a bathroom. Dry grout stays cleaner longer, so take the extra minute here. This also helps you see if you missed a spot so that you can catch it early.
How to Clean Grout Between Floor Tiles—What Do You Do If Nothing’s Working?
Scrubbed your heart out, and the grout still looks grimy? Don’t panic—it happens. Some stains go deep. Real deep. Especially in high-traffic spots like kitchens and bathrooms.
First, try going over the area again with a fresh round of cleaner. But this time, let it sit longer—10 to 15 minutes. Then scrub a little harder, using a stiffer brush. You’ll be surprised what a second round can lift. Still not budging? This is where heat can help. A lot of people now steam clean grout, and for good reason. Steam breaks down gunk that scrubbing can’t reach. It also kills bacteria without harsh chemicals. Just aim the nozzle at the grout lines, move slowly, and wipe away the loosened grime with a clean cloth.
No steamer? Don’t worry. Many hardware stores rent them. Or ask a neighbor—you never know who’s got one collecting dust. If all else fails, you may be dealing with stained, unsealed grout. In that case, it might be time to reseal—or in extreme cases, re-grout. But that’s rarely needed if you catch it early and clean it right.
How to Keep Grout Looking Like New
Clean grout feels amazing. But how do you keep it that way? Here’s the secret: a few small habits go a long way. And none of them takes more than a few minutes.
Start with a weekly wipe-down. Just a damp microfiber cloth is enough. Pay attention to areas that see the most foot traffic. Dirt builds fast, especially in kitchens and entryways. Quick wipes stop it from sinking in.
Next, clean up spills immediately. Grout is like a sponge. The longer liquids sit, the deeper they go. Especially if your grout isn’t sealed. Coffee, juice, grease—they all love sticking around. Use the right floor cleaner. Harsh or oily products leave residue that attracts even more dirt. Stick to pH-neutral cleaners made for tile floors. Your grout will thank you.
Thinking long-term? Seal your grout. Sealed grout repels stains and makes cleaning way easier. If your grout hasn’t been sealed in a while, consider doing it after your next deep clean. Most sealers last one to two years. Want to stay ahead of dirt year-round? Don’t miss our Floor Care Tips for Fall 🍂—your floors will thank you!
Finally, avoid bleach. It may whiten grout short-term, but it weakens it over time. Go gentle and stay consistent. That’s how clean grout stays clean.
How to Clean Grout Between Floor Tiles: Make Them Look Brand New
You just learned exactly how to clean grout between floor tiles—the fast, easy way. No harsh chemicals. No guesswork. Just real results with simple tools and smart habits. The best part? You don’t need to be a pro. With a little time and the right approach, clean grout is totally doable.
Tried something that made grout sparkle? ✨ We’d love to hear your tip! 💬👇 Please drop it in the comments! 🧼🧠


Leave a Reply