
Tired of staring at that dull gray floor? You’re not alone. Concrete is strong, sure—but it’s not exactly pretty. The good news? With a little time and a DIY concrete floor stain, you can turn that boring slab into something stunning. 🧱✨
It’s easier than you think. No fancy tools. No pro skills. Just a few steps, and your floor can go from plain to polished. Whether it’s your garage, patio, or even a basement, this guide will walk you through everything. We’ll keep it simple, budget-friendly, and fun. Ready to roll up your sleeves?
Let’s start!
Heads up! 🔍 This post contains affiliate links. As part of the Amazon Associates Program, we may earn a small commission 🛍️ (at no extra cost to you!) if you click and make a purchase. We only recommend products we truly trust. 👍
✅ What to Know Before You Start

Before grabbing a can of stain, it helps to get a few things right first. Here’s what matters:
✔Your concrete must be clean, porous, and unsealed. If it’s sealed or too smooth, the stain won’t soak in.
There are two main stain types:
👉Acid-based stains react chemically and soak deep into the concrete. They give a marbled, earth-tone look that lasts.
👉Water-based stains sit on the surface and offer more colors with easier application—but may need more maintenance later.
You may wonder: “Can you stain concrete floors?” Yes, absolutely—as long as the surface fits those prep requirements. Think about where you’ll stain:
👉Indoor floors benefit from low-odor water-based stains.
👉Outdoor patios or driveways often do better with UV-resistant acid stains.
✔If DIY isn’t your thing, or the floor is large or complex, there are professionals for that. Some of the most trusted U.S. companies that stain concrete floors include:
✅Craftsman Concrete Floors — a nationally recognized installer for residential and commercial stained concrete projects.
☑Five Star Painting (Concrete Staining Division) — offers both acid and water-based concrete stain services, with local coverage across the U.S.
✅Apex Custom Concrete & Masonry — known for premium coatings that resist fading and wear across multiple states.
Looking for a step-by-step DIY guide? Let’s dive in next and walk through exactly how to DIY concrete floor stain for solid results and real satisfaction.
✅ DIY Concrete Floor Stain Made Simple: Step-by-Step
Wondering how to stain concrete floors without messing them up? Don’t worry—we’ve got you! Just follow these five easy steps to get pro-looking results with your DIY concrete floor stain project.
Step 1: Prep the Surface Like a Pro
Before anything else, your floor must be clean, dry, and grease-free. Use a degreaser or a trusted concrete floor cleaner to scrub off any dirt or oil. Rinse well. Let the surface dry for at least 24 hours. If your floor is sealed, you’ll need to strip it first so the stain can soak in.
Step 2: Test in a Small Area First
Not all concrete takes stain the same way. That’s why testing is key. Pick a hidden corner, apply the concrete stain, and wait. This lets you see the color and how the floor reacts. Most people use a DIY concrete stain kit, which comes with everything: stain, applicator, safety gear, and even sealer.
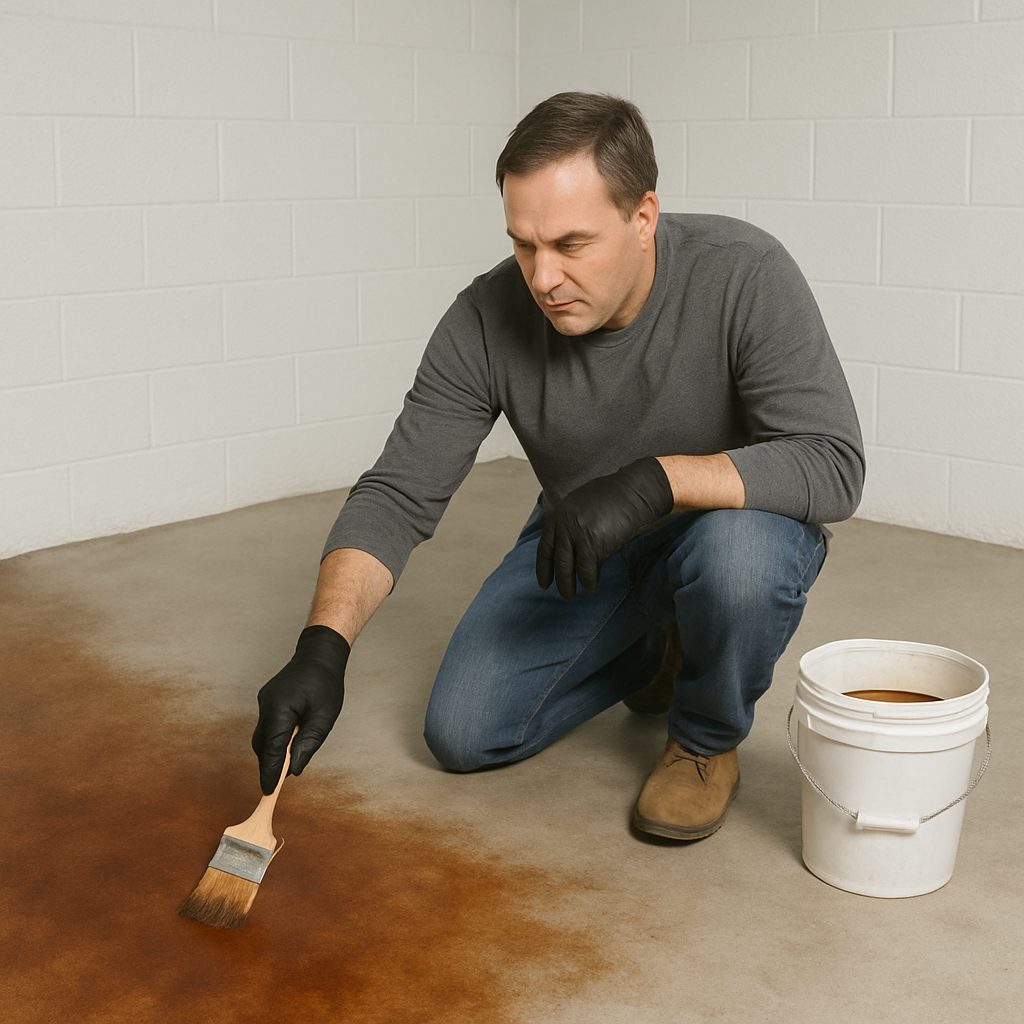
Step 3: Apply the Stain Evenly
Once you’re happy with the test spot, it’s go-time! Use a sprayer for large areas or a roller for small rooms. Move slowly. Overlap your strokes so the color blends nicely. Wear gloves and a mask—some stains can smell strong.
Step 4: Let the Stain Work Its Magic
Give the stain time to react. Most products need 4–6 hours, but always check your stain’s or kit’s instructions. Don’t walk on it or let pets near it while it’s drying.
Step 5: Seal the Surface (You Don’t Want to Skip This!)
After the floor is fully dry, it’s time to seal. This protects the color and adds a soft shine. Without a sealer, your stain may fade fast or stain easily from spills.
And that’s it—your floor’s now got that custom, stylish look without hiring a pro. Whether you’re doing a garage, basement, or even a patio, these steps make staining simple and stress-free.
✅ Common Mistakes to Avoid

DIY concrete floor stain projects are simple—but a few slip-ups can ruin the look. Here’s what to steer clear of:
❌ Skipping the Test Spot
Always, always test your stain first. Concrete doesn’t absorb evenly. One floor may turn deep brown, another might look pale. Testing helps you know what to expect before covering the whole space.
❌ Not Cleaning the Floor Deeply
Just sweeping isn’t enough. Leftover dirt, oil, or wax can block the stain from soaking in. Use a proper cleaner, rinse well, and let the surface dry fully. That first clean really matters.
❌ Overdoing It with the Product
Too much stain won’t make the color richer—it’ll make it blotchy. Stick to thin, even coats. If you want more color, you can always add another layer later.
❌ Forgetting the Sealer
This step is not optional. Without sealing, your stain may fade fast or absorb water and spills. A sealer keeps the color fresh and protects the floor long-term.
❌ Ignoring Safety
Concrete stain can have strong fumes. So open windows, turn on a fan, and wear gloves and a mask. Stay safe while you work—it’s just as important as the results.
✅ Final Tips and Wrap-Up
Yes—you can get pro-looking results with a DIY concrete floor stain. It’s all about prep, patience, and picking the right product.
Start small if you’re unsure. Try a corner of your garage or a backyard slab. You’ll get a feel for how the stain reacts without the pressure of a big project. Take your time. Clean well. Test the color. Seal at the end. Each step matters—but none are too tricky. 🖌️ Try it yourself and turn plain concrete into a floor you love!

Got questions? We’re here to help. 👇Drop a comment below—we’d love to hear about your project or any hiccups you hit.

Leave a Reply