Did you know that even small concrete cracks can let in water 💧 and lower your home’s value? Worse, they can grow and turn into trip hazards. Not fun. That’s why it’s smart to repair concrete cracks early—before they cause big trouble.
In this post, we’ll show you how to fix cracks the right way. You’ll learn why they happen, what tools you need, and how to get a smooth finish. We’ll also share the best fillers and epoxy DIYers swear by.
Let’s get started before that tiny crack becomes a big problem. 🛠️
Heads up! 🔍 Some links in this post are Amazon affiliate links. As an Amazon Associate, we may earn a small commission if you click and buy—at no extra cost to you. 💰
What Causes Concrete Cracks?

Concrete’s tough, but it’s not invincible. Cracks happen for all kinds of reasons.
Sometimes, it’s poor curing—when concrete dries too fast. Other times, it’s the ground moving under your floor. Soil shifts, and cracks appear.
Freeze-thaw cycles don’t help either. Water gets in, freezes, and boom—your concrete expands and breaks. 🚫 Heavy stuff sitting too long? That pressure can also wear it down.
Here’s a big one: foundation settling. It’s not the same as surface wear. If your foundation shifts, the cracks go deep—and they get worse fast.
That’s why concrete floor crack repair isn’t optional. Cracks let in moisture, mold, and even pests. According to ConcreteNetwork, small cracks now can mean big repairs later. So don’t wait. Fix early. Save money.
How to Repair Concrete Cracks – Step-by-Step
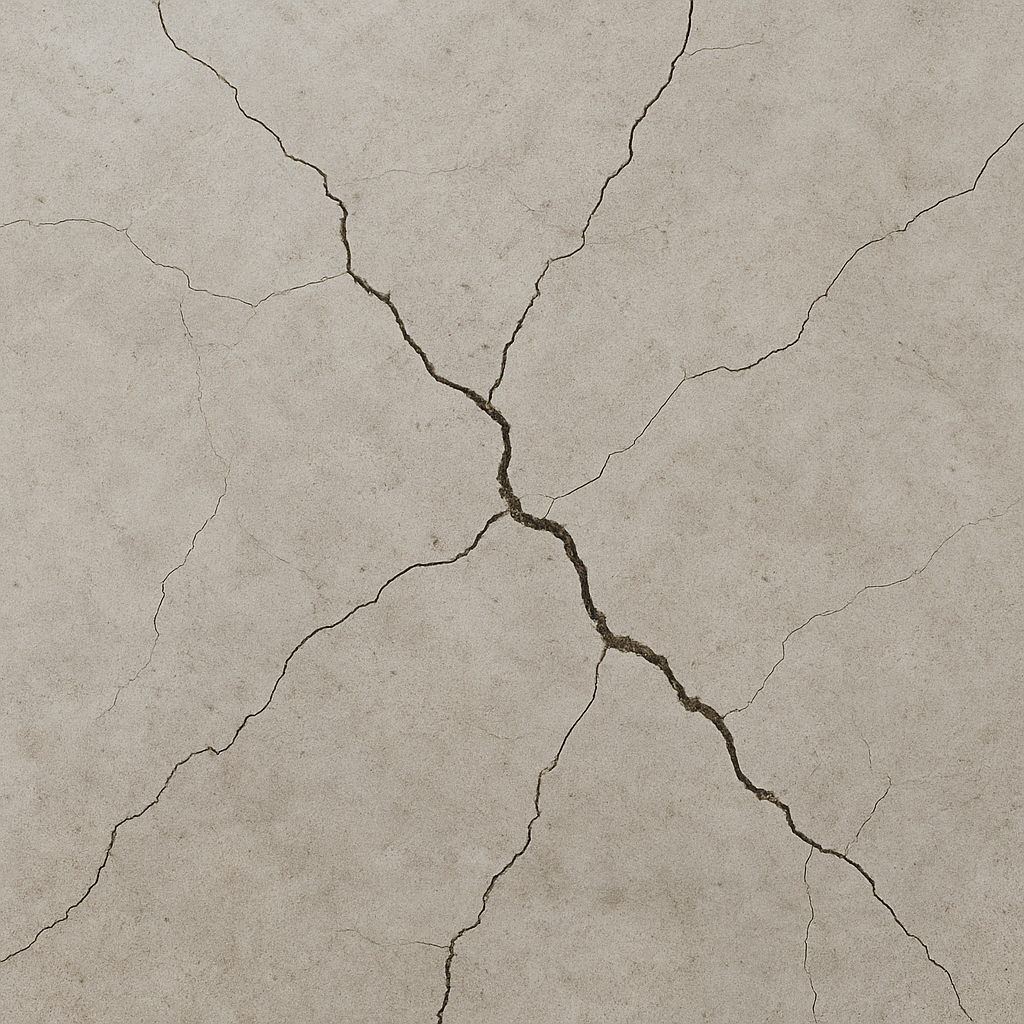
You can repair concrete cracks at home—even if you’ve never touched a trowel. Just take your time, stay safe, and follow these 3 simple steps.
Before you start, gather these basic tools. They’ll make the job smoother and safer:
☑Wire brush – To clean out loose debris
☑Screwdriver or chisel and hammer – To widen deep cracks (if needed)
✔Shop vac or broom – For removing dust and dirt
✔Crack filler – Choose epoxy, liquid filler, or patching compound based on crack size
☑Putty knife or trowel – To apply and smooth the filler
☑Gloves and safety glasses – Always protect your hands and eyes
✔Concrete sealer – For finishing and preventing future damage
Got your gear? Great! Let’s move on to the step-by-step guide.
Step 1: Clean and Prep the Crack
First, clear out all the loose bits. Use a stiff brush or screwdriver to dig out dust, dirt, or debris. A shop vacuum works great here. If the crack is deep (over ¼ inch), widen it slightly using a chisel and hammer—this helps the filler bond better.
Finally, rinse the area and let it dry completely. Moisture will mess with the repair, so be patient here.
Step 2: Fill the Crack with the Right Product
Choose your filler based on crack size and location. Hairline cracks? Use a liquid crack filler. Wider/deeper cracks? Go for concrete crack repair epoxy or patching compound. Outdoor cracks? Pick something flexible to handle freeze-thaw cycles.
Squeeze or trowel the filler into the crack. Push it deep so no air pockets are left. Smooth the surface with a putty knife.
Step 3: Let It Cure and Seal for Extra Protection
Let the filler cure—some take hours, others days. Always check the label!
Once cured, seal the area to keep out water, stains, and future cracks. A good concrete floor sealer adds strength and shine. Need help choosing a sealer after filling? See our full guide: Concrete basement floor sealer.
👷♂️ Safety Tip: Always wear gloves and eye protection. And don’t rush—curing time is key to long-lasting results.
Which Products Work Best?
Not all cracks are the same—and neither are the products to fix them. Choosing the right one makes your repair last longer and look better.
🧪 Epoxy: Strong, Long-Lasting Repair
Epoxy is a favorite for deep, structural cracks. It bonds tightly to concrete and hardens like rock. Many DIYers use concrete crack repair epoxy when dealing with wide or settled cracks in garage floors or basements. It’s a tough, permanent fix that restores strength to the surface.
🟢 Best for: Structural cracks
🔴 Watch out: Can be tricky to apply in cold or damp conditions
💧 Polyurethane: Flexible and Waterproof
Got cracks that expand and contract? Polyurethane is your go-to. It’s more flexible than epoxy and better at sealing active cracks. Many formulas expand slightly to fill gaps, making it perfect for basements or outdoor slabs.
🟢 Best for: Active or leaking cracks
🔴 Watch out: Not as strong as epoxy for structural fixes
🛠️ Patching Compound: Quick Surface Fixes
For small, surface-level damage or hairline cracks, patching compounds are simple and effective. These premixed products spread easily with a putty knife and dry fast.
🟢 Best for: Hairline or cosmetic cracks
🔴 Watch out: Not suitable for deep or moving cracks
Still unsure which one to pick? If the crack is wider than 1/4 inch or leaks, go with epoxy or polyurethane. For small surface lines, patching works fine. ✅
Mistakes to Avoid When Fixing Cracks

Even a small slip-up can lead to a bigger, costlier problem later. If you’re learning how to repair cracks in concrete, here are a few mistakes you’ll want to dodge:
🏃♂️ Rushing the Job
Concrete fixes need time. Skipping dry time or applying products too fast can ruin your work. Be patient—your floors will thank you.
🧼 Skipping Cleaning or Prep
A dirty crack won’t bond well with any filler. Always clean out dust, dirt, and debris before adding anything. It’s step one for a reason.
❌ Choosing the Wrong Product
Not all cracks need the same fix. Deep cracks often need epoxy. Surface ones? A patch might do. Using the wrong product means redoing the whole job later.
🚫 Not Sealing Afterward
After filling the crack, sealing the area is a must. It protects the repair from water, stains, and further cracking. Don’t skip this step—it adds years to your fix.
Sealed and Safe – Time to Wrap It Up!
Cracks in concrete might look harmless at first. However, they can grow fast. The good news? You now know how to repair concrete cracks the right way. With just a few tools and a little time, you can stop damage early, protect your floors, and even boost your home’s value. So, don’t wait for cracks to spread—patch and protect today! 💪
Have a question? Or want to share your repair win? Drop a comment below—we’d love to hear from you! 👇











Leave a Reply