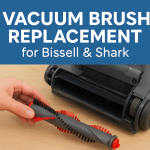
Your vacuum is on, but nothing’s getting picked up. You can hear the motor and see the crumbs, but nothing’s happening. These are clear signs that the brush roll has worn out or is tangled. The good news? A vacuum brush replacement is probably easier than you think.
And that’s exactly what this guide’s all about. Whether you’re using a Shark or a Bissell, we’ll walk through the simple steps. No fluff, no fuss. Just a quick fix to get your vacuum back in action. 🧼
💬 Heads-up: Some of the links in this post are affiliate links. As an Amazon Associate, I earn from qualifying purchases—at no extra cost to you!
How to Replace the Brush on a Shark Vacuum
Ready to tackle your Shark vacuum brush replacement? You’ll need the following tools: Usually just a screwdriver. However, some Shark models don’t need any tools at all. Check your manual to be sure.
Shark vacuums come with two main brush types: the self-cleaning brush roll and the traditional brush roll. The self-cleaning brushes are designed to reduce hair wrap, but both can wear out over time and need replacing.
Here’s a quick step-by-step for most models:
Step 1️⃣: Unplug your vacuum. Safety first!
Step 2️⃣: Flip your vacuum over and locate the brush cover.
In Step 3️⃣: Use a screwdriver or your fingers (depending on your model) to remove the cover.
Step 4️⃣: Carefully pull out the brush roll. You might need to disconnect a belt if your model has one.
Next Step 5️⃣: Slide in your new brush roll, making sure it fits snugly.
Step 6️⃣: Reattach the belt if needed, then snap the cover back on.
Plug it in and test it out! If your vacuum has a self-cleaning brush roll, the process is very similar—just keep an eye out for any clips or latches unique to your model. Performing a Shark vacuum brush roll replacement regularly keeps your vacuum running smoothly and your floors cleaner!
If you prefer to see the steps in action, we found a super helpful video that walks you through the process.
🎥 Note: This video is not ours. We’re sharing it because it’s genuinely helpful. All credit goes to the amazing team at ShopJimmy for putting it together.
How to Replace the Brush on a Bissell Vacuum
Doing a Bissell vacuum brush replacement might sound tricky, but it’s actually pretty simple. First, check if you need any tools. Most models just need a Phillips screwdriver. A few have quick-release covers that pop off by hand. Check your manual if you’re not sure.
Here’s how to get it done:
Step 1️⃣: Unplug your vacuum for safety.
In Step 2️⃣: Flip it over so you can see the brush area underneath.
Step 3️⃣: Look for screws or release tabs holding the brush cover in place.
Next Step 4️⃣: Remove the cover to expose the brush roll.
Step 5️⃣: Slide or lift the old brush roll out. Some models have a belt—note how it’s placed.
Step 6: Drop in the new brush, making sure it lines up with the belt and sits snugly.
Step 7️⃣: Reattach the cover and tighten any screws.
Give it a quick test run to make sure everything’s spinning smoothly! Most Bissell models follow this same layout—especially uprights and cordless stick vacs. Replacing the brush helps your vacuum clean better and last longer. Don’t wait until it’s packed with hair or totally worn out.
Prefer to see it in action? Here’s a helpful video:
Credit: All credit goes to the creator at the official Bissell YouTube channel.
Brush Care Tips for All Vacuums
Want your vacuum to last longer and clean better? Apply the following tips to take care of the brush roll.
🧹 Check the Brush Role Every 1–2 Weeks
A quick look goes a long way. If you see hair, threads, or fuzz wrapped around it, clean it right away.
✂️ Use Scissors or a Seam Ripper to Snip Tangles Off Safely
Don’t pull too hard; you might damage the bristles.
🧼 When Should You Replace the Brush Roll?

There’s no one-size-fits-all for a vacuum brush replacement. It all depends on how you use your vacuum. However, as a rule of thumb, if the bristles look worn down, bent, or feel soft, it’s time for a new one. If it just looks dirty, give it a good clean instead.
And don’t forget—brush care isn’t the only thing. A clogged filter can kill suction, too. 👉 Check out our vacuum filter replacement guide to keep the whole machine running strong.
Time for That Vacuum Brush Replacement Glow-Up ✨
A quick vacuum brush roll replacement can make a huge difference. Better suction. Cleaner floors. Less frustration. It’s one of the easiest ways to boost your vacuum’s performance and extend its life.
Just a little regular maintenance—like checking the brush and cleaning your filter—goes a long way. And hey, most brush swaps take less than 10 minutes. That’s a small fix for a big payoff. 💪
Give it a try and let us know how it went!
Did your vacuum get its groove back? Drop a comment—we’d love to hear about your success!


Leave a Reply